How to Create Professional Business Cards with LaTeX and Tikz
Category: Latex
Date: April 2023
Views: 1.22K
Greetings dear readers, In this article I am going to show you how to create awesome business cards using nothing but Latex and Tikz, No need for payed software Like Adobe Illustrator or the like.
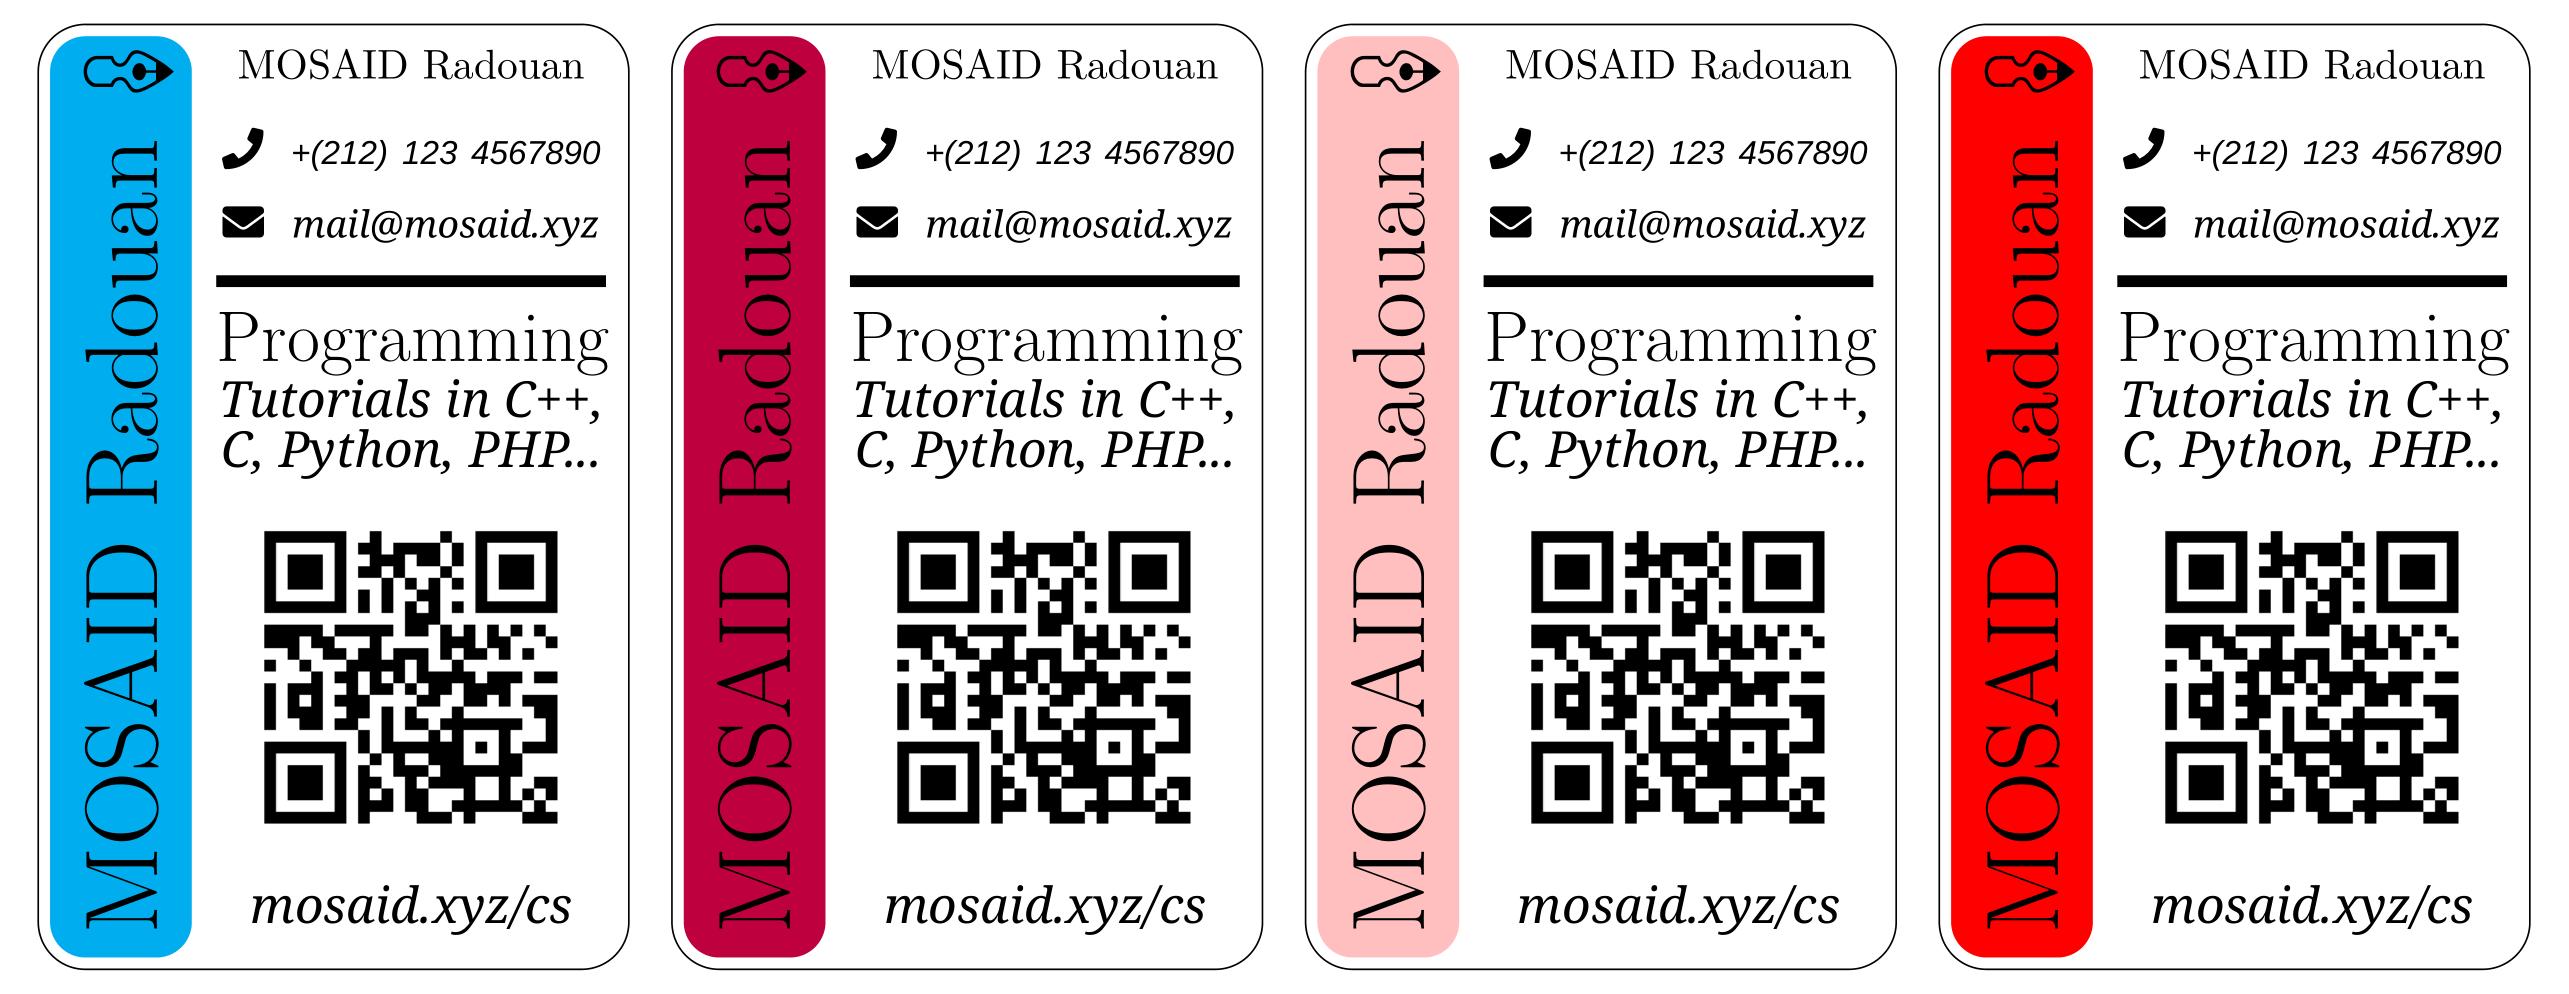
Our business card will be a small rectangle with a width of 5 and height of 8. It will contain two parts, a small band or strip (width = 1.2 ) that we will color in cyan and the bigger part is the rest of the card. we'll achieve this using the following Latex commands:
\pgfmathsetmacro{\cardroundingradius}{4mm}
\pgfmathsetmacro{\striproundingradius}{3mm}
\pgfmathsetmacro{\cardwidth}{5}
\pgfmathsetmacro{\cardheight}{8}
\newcommand{\stripcolor}{cyan}
\pgfmathsetmacro{\stripwidth}{1.2}
\pgfmathsetmacro{\strippadding}{0.1}
\pgfmathsetmacro{\textpadding}{0.2}
\pgfmathsetmacro{\ruleheight}{0.1}
the \cardroundingradius will make for a nice looking round corner in the border of our card. The other commands are self-explanatory.
Next we will define the information we will put in our card such as email, phone number, name ...
\newcommand{\striptext}{MOSAID Radouan \rotatebox[origin=c]{-90}{\ding{49}}}
\newcommand{\name}{MOSAID Radouan}
\newcommand{\email}{ \faEnvelope~ \textit{\fontspec{Noto Serif}\fontsize{9pt}{12pt}\selectfont mymail@website.xyz}}
\newcommand{\myphone}{ \faPhone~ \textit{\fontspec{Liberation Sans}\fontsize{8pt}{10pt}\selectfont +(212) 123 4567890}}
\newcommand{\site}{\textit{\fontspec{Noto Serif}\fontsize{12pt}{14pt}\selectfont mosaid.xyz/me}}
\newcommand{\bottomcaption}{Programming}
\newcommand{\content}{\textit{\fontspec{Noto Serif}\fontsize{12pt}{14pt}\selectfont Tutorials in C++, C, Python, PHP...}}
\newcommand{\photo}{\includegraphics[width=\textwidth]{frame.png}}%QR code can be obtain online for free for your
\newcommand{\stripfontsize}{\Huge}                                %website
\newcommand{\captionfontsize}{\LARGE}
That's all the preparations we need to make our business card, what's next is to create our tikzpicture environment and start drawing the components of our card like so:
\begin{tikzpicture}
    \draw[rounded corners=\cardroundingradius] (0,0) rectangle (\cardwidth,\cardheight);
    \fill[\stripcolor,rounded corners=\striproundingradius] (\strippadding,\strippadding)
	rectangle (\strippadding+\stripwidth,\cardheight-\strippadding)
	node[rotate=90,above left,black,font=\stripfontsize] {\striptext};
    \node[align=center, text width=(\cardwidth-\strippadding-\stripwidth-2*\textpadding)*1cm,
	  below right,inner sep=0] at (\strippadding+\stripwidth+\textpadding,\cardheight-\textpadding)
    {
	{\name}\\
	\vspace{0.3cm}
	{\myphone}\\
	\vspace{0.2cm}
	{\email }\\
	\tikz{\fill (0,0) rectangle (\cardwidth-\strippadding-\stripwidth-2*\textpadding,\ruleheight);}\\
	\vspace{0.2cm}
	{\captionfontsize \bottomcaption}\\
	{\content}\\
	{\photo }\\
	{\site}\\
    };
\end{tikzpicture}

Just a quick note for anyone following along: The \faEnvelope and \faPhone commands used in the \email and \myphone definitions require the Font Awesome package to be loaded in the LaTeX document. If you don't have this package installed, you can replace these commands with regular text (e.g. "Email:" and "Phone:") or find an alternative package that provides similar icons.
And there you are, you can try to experiment with the above latex template and create your own awesome business cards, until the next latex tutorial, happy latexing.
Related Articles


Most Recent Articles


Most Viewed Articles


0 Comments, latest
No comments.